Category: Ideas

Course craft, club nights and ways to play more.

  • Free Printable: A Disc Golf Round Debrief Sheet That Turns Scores Into Practice Ideas

    Free Printable: A Disc Golf Round Debrief Sheet That Turns Scores Into Practice Ideas

    A score tells you what happened. A short debrief helps you decide what to do next.

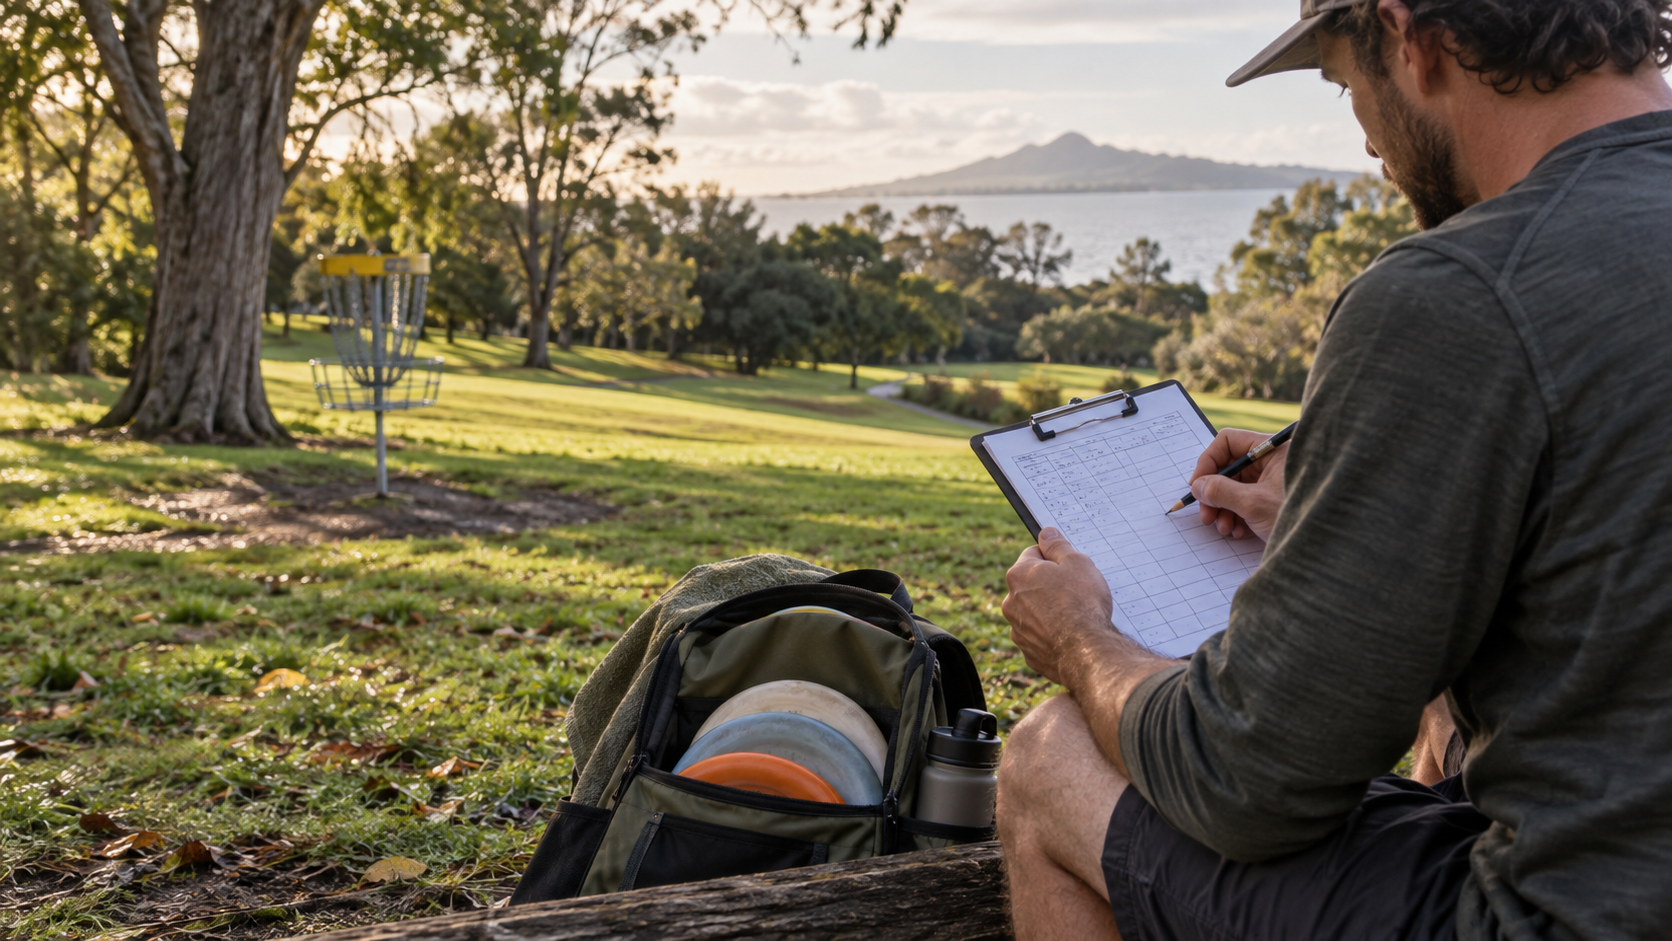
    This free, print-friendly disc golf round debrief sheet is designed for ordinary rounds at your local course. It is not another complicated statistics project. It gives you a place to record the conditions, notice one or two patterns, and choose a small focus for next time.

    The aim is useful reflection rather than self-criticism. A rough hole can teach you something, but it does not need to define the whole round.

    Print the free round debrief sheet

    To use this resource, select Print in your browser and choose Save as PDF if you want a digital copy. You can also print the page and write on it with a pencil. For a short round, complete all nine rows. For 18 holes, print a second copy or use the back.

    Disc golf round debrief sheet

    Player: ____________________   Date: ____________________

    Course: ____________________   Round length: 9 / 18 holes

    Weather and ground: _________________________________________________

    Round intention: ____________________________________________________

    Hole Score What was my decision? What will I remember?
    1
    2
    3
    4
    5
    6
    7
    8
    9

    Best decision of the round: __________________________________________

    One thing to practise: _________________________________________________

    One simple plan for next round: _______________________________________

    How to use it without overthinking

    1. Set the scene before you review

    Write down the course, date and broad conditions first. Wind, rain, slippery ground, a crowded park or a particularly hilly layout can change the difficulty of a round. Recording that context stops you from treating every score as a pure test of technique.

    2. Capture decisions, not every emotion

    After each hole, make a brief note about the choice that mattered: did you lay up, take a wider route, throw a slower disc, run a putt or play for safety? You do not need a perfect technical diagnosis. A few honest words are enough to make the round easier to remember.

    3. Choose one practice idea

    At the end, look for a repeatable pattern. Perhaps your upshots were short, your first putt was rushed, or your safest route was better than the ambitious line. Choose one practice idea that you can actually repeat in a short session. One clear focus is more useful than a list of ten faults.

    What the sheet is — and is not

    The sheet is a personal learning tool. It does not replace the scorecard used to record the group’s official hole scores. The PDGA scoring rule says scores are recorded after each hole, including penalty throws where applicable. Keep doing that during a competition or organised round; use the debrief below the scorekeeping task.

    New Zealand Disc Golf also highlights self-officiating, good course flow and respect for shared public spaces in its rules and etiquette guidance. Those ideas belong in a debrief too. If a group behind you was waiting, a path was busy or a lost disc search slowed play, that is useful course awareness to note alongside the throwing choices.

    Make the next round easier to plan

    Keep completed sheets in a folder or take a quick photo after the round. Before you play the same course again, read the last three lines: the best decision, the practice focus and the next-round plan. That small review gives you a starting point without turning a casual game into homework.

    If you use the sheet for a social round, invite each player to name one good decision rather than comparing every score. It keeps the resource useful for beginners, families and club groups while still giving experienced players a simple way to spot habits.

    FAQs

    What is a disc golf round debrief sheet?

    It is a simple reflection page used after or during a round to record conditions, decisions, useful observations and one practice focus. It sits alongside a scorecard rather than replacing it.

    Does this replace an official disc golf scorecard?

    No. Use the normal scorecard for each player’s hole scores and any penalties. Use this sheet for notes about decisions, conditions and what you want to remember.

    Do I need to fill in every row?

    No. Complete as much as is useful. You can write one short note for each hole, or use the final prompts only if you want a quick review after the round.

    Can a beginner use this printable?

    Yes. A beginner can focus on simple observations such as which throw felt controlled, where a safer route helped, or what part of the hole was confusing. No advanced statistics are required.

    Can I use it for an 18-hole round?

    Yes. Print a second copy for holes 10 to 18, or use the first page for key notes and continue on the back. The final practice and next-round prompts only need to be completed once.

    How often should I use a round debrief?

    Use it often enough to notice patterns, but not so often that it becomes a chore. A weekly round, a new course or a round where you tried a different plan are all good times to use it.
  • How to Run a Disc Golf Course Working Bee

    How to Run a Disc Golf Course Working Bee

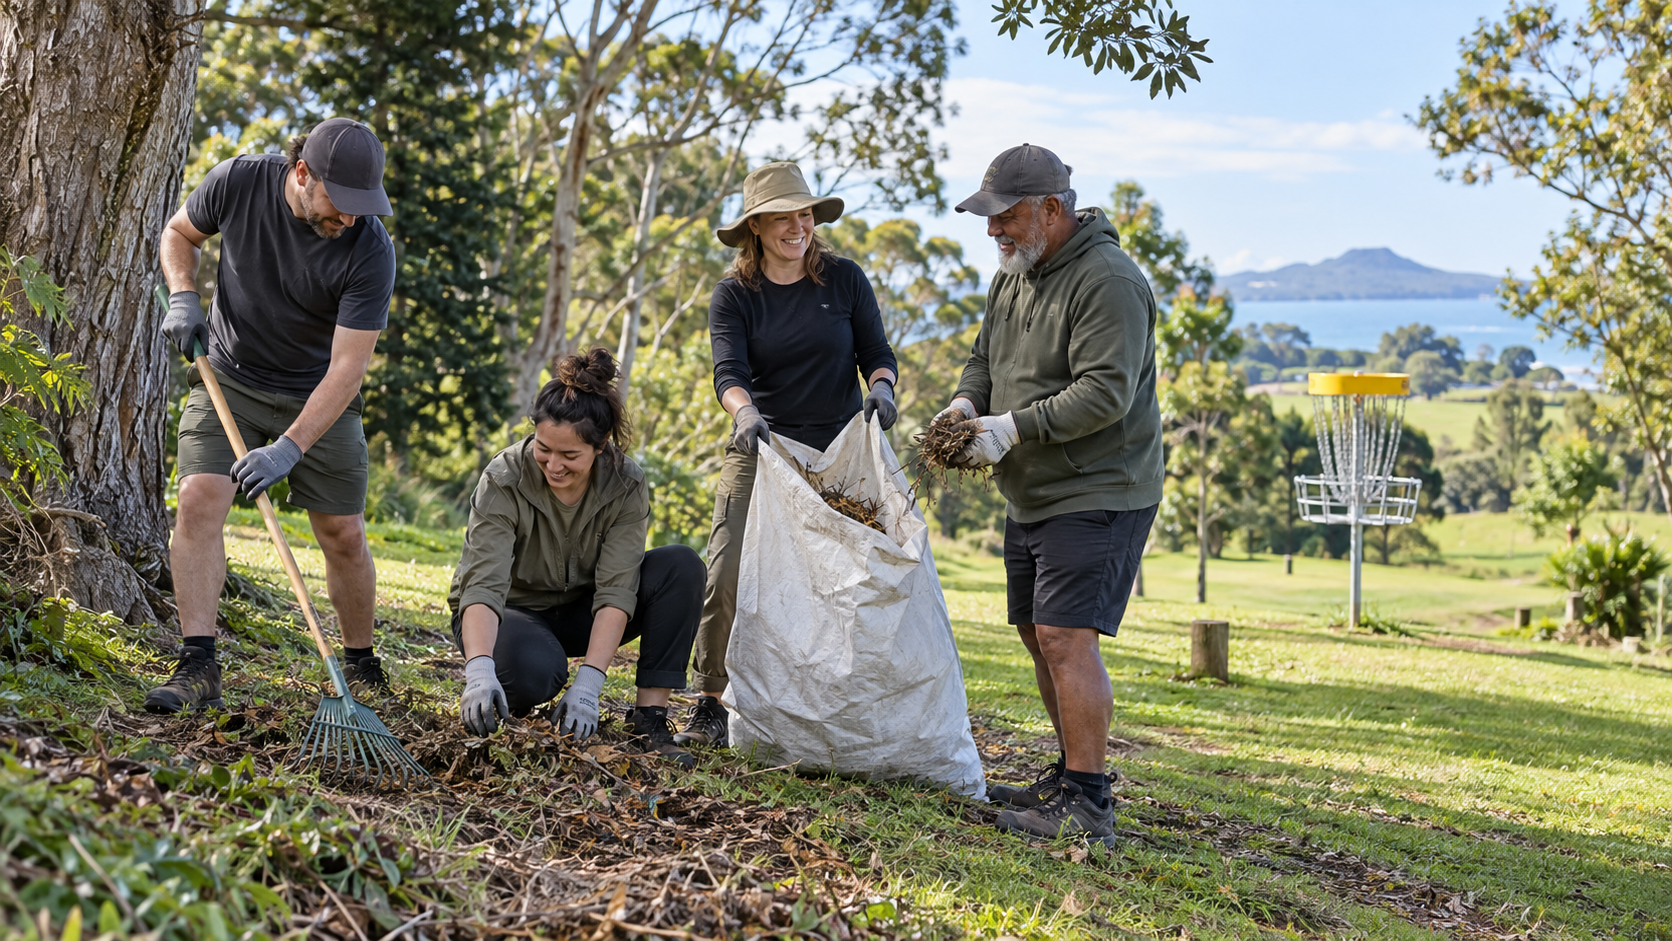
    A tidy, well-cared-for course is easier to enjoy and easier to share with the wider park community. A club working bee does not need to become a major landscaping project: with permission, a short list and a few clearly assigned jobs, a group can make a visible difference in one morning.

    This idea fits the way NZDG describes good course development: courses should work with the natural setting, share space with other park users and keep safety at the centre. Use the NZDG course guidance as a starting point, then follow the land manager’s instructions for your local site.

    Start with permission and a small target

    Contact the council, reserve manager, landowner or club contact before planning work. Confirm what volunteers may do, where green waste and rubbish should go, and whether any tools or protective equipment are restricted. Do not remove trees, reshape ground, move signs or change a hole layout without the relevant approval.

    Choose one modest outcome for the first session. It could be clearing loose rubbish from the fairway edges, trimming back a permitted overgrowth area, refreshing a sign location or checking that tee and basket approaches are easy to find. A focused target is easier to explain and easier to finish.

    Make a short job list

    Walk the course before the working bee and write down the jobs in order of importance. Separate simple volunteer tasks from anything that needs a qualified contractor or land-manager decision. Useful headings include litter collection, leaf and branch removal, path-edge visibility, signage checks, tee-area tidying and a final safety walk.

    Keep the list visible on the day. A simple job board or shared phone note can show which areas are complete and stop several people from doing the same task while another hole is missed. Take a few before-and-after photos for the club’s records, but avoid photographing members of the public without permission.

    Give people safe, clear roles

    Start with a short briefing. Explain the work area, where volunteers may stand, what to do if they find broken glass or another hazard, and when the course is closed to play. During active work, pause throwing through that area. Disc golf is played in shared spaces, so keep paths, playgrounds, dog walkers and other park users in mind.

    Offer different roles so people can contribute comfortably: a course walker with a rubbish sack, a spotter for a work area, a tool user where permitted, a sign or map checker, and a person keeping the job list moving. Gloves, closed shoes, water and sun or rain protection are sensible basics. If a task involves heights, powered tools, heavy lifting or uncertain vegetation, leave it to the appropriate person.

    Work with the park, not against it

    NZDG’s course guidance emphasises using the character of the land and designing for coexistence with the wider community. A working bee should follow the same principle. Clear what creates a genuine safety or access problem, but do not strip away every natural feature just to make the course look manicured.

    When in doubt, stop and ask the land manager. The best result is a course that remains recognisably part of its setting, is safer to navigate and is more welcoming to the people who share the space.

    Finish with a simple review

    Before everyone leaves, walk the affected holes again. Check that no tools, rubbish, loose branches or temporary markers have been left behind. Confirm that tees and baskets are visible, access routes are clear and the course can safely reopen. Record any follow-up work rather than trying to solve every problem in one session.

    Thank the volunteers, share what was completed and set a realistic date to review the area. Regular small check-ins are easier to sustain than waiting until a course needs a major rescue.

    Frequently asked questions

    1. Do we need permission for a disc golf course working bee?

    Yes. Contact the relevant council, reserve manager, landowner or club contact before planning work, and follow their instructions about tools, vegetation, rubbish and layout changes.

    2. What should a first working bee focus on?

    Choose one modest outcome such as litter collection, tidying permitted edges, checking signs or improving visibility around a tee or basket approach.

    3. Can volunteers remove trees or reshape the course?

    Not without the relevant approval. Separate volunteer tasks from work that needs a qualified contractor or a land-manager decision.

    4. What safety rules matter most on the day?

    Brief volunteers, define the work area, pause throwing through active work and keep paths and other park users in mind. Stop and ask for help when a hazard is uncertain.

    5. What should volunteers bring?

    Gloves, closed shoes, water and suitable sun or rain protection are sensible basics. Only bring tools that the land manager has allowed.

    6. How often should a club hold a working bee?

    There is no single schedule for every course. Small, regular check-ins are often easier to sustain than waiting until major work is needed.

  • Plan a six-station beginner disc golf intro day

    Plan a six-station beginner disc golf intro day

    A beginner does not need a full bag, a perfect backhand or a competition-sized event to enjoy disc golf. A short introduction with simple stations can give new players a first taste of throwing, putting, course etiquette and the fun of playing together.

    This six-station format is designed for a club, school, workplace group, community day or friends’ gathering. It follows the spirit of NZDG’s beginner guidance: disc golf can be played in shared public spaces, does not require much equipment, and players with different skill levels can take part together.

    Start with a simple plan

    Choose a safe, accessible park or course and keep the first session short. If you are organising a public or club event, read NZDG’s event-planning guidance before setting a date. It highlights the need to consider capacity, permissions and safety, and recommends checking the calendar so your event does not clash with a larger tournament nearby.

    For equipment, aim for one beginner-friendly disc per person where possible, with a few spare discs available. A beginner does not need a specialised collection; NZDG’s starter information says one to three discs can be enough to begin. Mark practice areas with plain cones or visible objects, and keep throws directed into open space.

    The six stations

    1. Welcome and the basic idea

    Start with a five-minute explanation: players throw from a tee towards a basket, then throw again from where the disc comes to rest. The aim is to complete the hole in as few throws as possible. Show the group how to stand behind the disc, wait for the area ahead to be clear, and take turns.

    Keep the introduction visual. Hold up a putter or mid-range disc, point out the basket and demonstrate one relaxed throw. New players have enough to take in without a long rules lecture.

    2. Grip and flat release

    Give each person a comfortable grip and one simple throwing cue: keep the motion smooth and finish with the disc on a predictable angle. Let beginners make short throws into a wide target area rather than chasing distance.

    Volunteers should demonstrate once, then watch for one useful adjustment at a time. Avoid rebuilding someone’s entire technique during their first ten minutes with a disc.

    3. Putting into the basket

    Set up a short putting station with several discs and a clear throwing line. Begin close to the basket so everyone can experience a successful putt, then let players step back if they want a challenge.

    Use a small game such as “make two out of five” or “choose your own distance”. The point is to learn the target and a repeatable motion, not to create a leaderboard.

    4. Throwing to a landing zone

    Mark a broad landing zone with cones. Ask players to throw a controlled shot that finishes anywhere inside it. This introduces the idea that good disc golf is often about choosing a useful landing area rather than simply throwing as far as possible.

    Offer a shorter line for anyone who is new or unsure. Keep groups spaced out and only retrieve discs when the throwing area is safe.

    5. Etiquette and safety

    Make this station practical rather than formal. Demonstrate waiting until the fairway is clear, standing well away from another player’s swing, watching where discs land, helping with searches and keeping bags or drink bottles out of throwing lanes.

    Because many courses share public parks, remind the group to give way to walkers and other park users. Organisers should also check the venue’s permissions and identify any roads, paths, water or other hazards before the session starts.

    6. A short team mini-hole

    Finish with a short hole or reduced layout. Put beginners in small groups with a supportive player or volunteer, and let each person complete the hole from a suitable tee or marked start point.

    Keep the scoring optional. A simple “best moment of the hole” debrief can be more welcoming than comparing totals. Ask what felt comfortable, what surprised them and which station they would try again.

    Make the day welcoming

    Use plain language, offer more than one throwing distance and make it clear that nobody needs to be athletic or experienced to join in. Avoid making a new player throw in front of a crowd if they would rather practise with a partner.

    Plan for weather, water and shade. Give volunteers defined jobs such as greeting, demonstrating, spotting throws, managing discs and checking that the next group is ready. A simple timetable might allow ten minutes at each station, a short break, then twenty minutes for the mini-hole.

    End with a clear next step: share the local course, club night, beginner session or official course finder. NZDG’s guidance notes that disc golf can be played informally, in leagues and in tournaments, so a first intro day can lead to whatever level of involvement suits the player.

    A repeatable community format

    The best part of this idea is that it can be repeated. Keep the cones, spare discs, short briefing and station cards together in a club tub. After each session, note which station ran long, which explanation confused people and what beginners asked most often.

    That feedback gives the next intro day a better starting point without turning it into a complicated programme. A welcoming first experience is a practical way for a club, school or community group to help more people discover disc golf in Aotearoa.

    Sources: NZDG: What do I need to start? and NZDG: Run an event?.

    FAQs

    Who could run a beginner disc golf intro day?

    A local club, school, workplace, community group or group of friends could use this format, provided the venue is suitable and any required permissions are arranged.

    How much equipment does a beginner need?

    Not much. One suitable disc per person plus a few spares is enough for an introduction, and NZDG’s starter guidance says one to three discs can be enough to begin.

    How long should the six-station session take?

    A practical starting point is about ten minutes per station, followed by a short break and a twenty-minute mini-hole, with flexibility for the group.

    What should the safety briefing cover?

    Cover waiting until the throwing area is clear, standing safely near other players, watching discs, helping with searches and giving way to other park users.

    Should beginners keep score?

    Scoring can be optional. A short mini-hole can focus on learning and confidence, with scores added only if the group wants them.

    How can players continue after the intro day?

    Share a local course, club session, beginner event or the official NZDG course and club resources so each player can choose a comfortable next step.

  • Free printable: a simple disc golf course-notes sheet for better rounds

    A new disc golf course can feel like a puzzle. You are trying to work out the lines, the wind, the landing zones, the out-of-bounds areas and the safest way to reach the basket — all while a group waits behind you and your first throw is already in your hand.

    A simple course-notes sheet gives you somewhere to put those decisions. It also helps you notice patterns instead of relying on a vague memory of whether a hole felt hard. You do not need a detailed survey, a perfect map or a bag full of specialist discs. You need a few useful observations that make your next shot easier to plan.

    Why course notes are worth keeping

    Most players remember the dramatic parts of a round: the tree kick, the long putt, the disc that disappeared in the rough. Those moments are memorable, but they are not always the information that will help next time.

    Good notes capture repeatable details:

    • where the safest landing area is;
    • which side of the fairway gives you the clearest next shot;
    • how the wind behaves at tee height and near the basket;
    • where a missed shot is likely to finish;
    • what distance or shape you actually faced, rather than what you hoped to throw.

    The aim is not to make a casual round feel like homework. The aim is to reduce decision fatigue. When you return to the course, you can spend less time guessing and more time committing to a sensible plan.

    Use the sheet in three passes

    Pass one: before the first throw

    Walk to the tee and look at the whole hole before choosing a disc. Write down the basic shape: open, wooded, uphill, downhill, tight, wide or mixed. Then identify the first decision that matters. It might be a low ceiling, a turning fairway, a slope beside the basket or a road that you need to avoid.

    Do not try to predict every bounce. Pick one conservative landing zone that leaves you a clear second shot. If you are playing a new course, a controlled first throw is often more useful than a high-risk attempt at the perfect line.

    Pass two: after the drive

    Once your disc has stopped, note what the hole actually gave you. Was the landing zone as generous as it looked from the tee? Did the fairway play narrower than expected? Did the wind push the disc earlier, later or more strongly than you planned?

    Record the useful adjustment in plain language. “Start wider” is better than a paragraph about the throw. “Keep the miss left” is better than writing down every tree you saw. Your future self needs a decision, not a transcript.

    Pass three: after the hole

    When the hole is complete, give it one quick rating for risk and one for confidence. A hole can be difficult but predictable, or easy-looking but full of awkward misses. Those are different problems and deserve different plans.

    Finish with one sentence: “Next time I will…” Examples include “throw a slower disc,” “lay up before the slope,” “aim at the gap, not the basket,” or “check the wind again near the green.” That sentence becomes the most valuable part of the note.

    What to record on each hole

    Keep the sheet small enough to use while you play. These are the fields that earn their space.

    Hole shape

    Use a short label such as straight, gentle hyzer, turning, tunnel, open or split fairway. The label is a prompt to remember the intended flight, not a technical classification.

    First landing zone

    Mark the part of the fairway where you want your opening throw to finish. On a long hole, this may be a broad area rather than a single spot. Choosing it before you throw keeps the plan focused on position.

    Preferred miss

    Every hole has a miss that leaves a better recovery than the others. Write left, right, short, long or centre, then add a few words if needed: “short is safer than long” or “right side blocks the upshot.” This is especially helpful when the basket is near a boundary, steep bank or dense rough.

    Wind and elevation

    You do not need a detailed weather record. Note what you felt: headwind, tailwind, crosswind, swirling, uphill or downhill. If the wind changes during the round, update the note rather than treating the first observation as permanent.

    Next-shot shape

    Write down what the second shot needs to do. It might need to finish flat, stay below branches, avoid skipping or land softly. This helps you choose a disc for the shot you need, not simply the disc you threw well on the previous hole.

    How to turn notes into a better plan

    After the round, look for repeated decisions rather than isolated mistakes. If three holes punished early turn, the lesson may be about release angle or disc selection. If several approaches finished long, the lesson may be about height and ground play. If putting felt difficult, check whether your approach shots were routinely leaving awkward distances.

    Choose only one or two changes for your next round. A long list can make you play cautiously without making you play better. A focused adjustment is easier to remember under pressure.

    You can also separate course notes from technique notes. “Use a wider starting line on hole 6” is course information. “Keep the reach-back level” is a throwing cue. Both are useful, but mixing them together can make the page harder to use when you are standing on the tee.

    Free printable course-notes sheet

    You can print this section directly from your browser or save it as a PDF for your next round. If you prefer paper, use one line per hole and keep the sheet on a clipboard or in a clear sleeve.

    DISC GOLF COURSE NOTES
    
    Course: __________________________   Date: _______________
    Round goal: ______________________________________________
    
    Hole | Shape | Landing zone | Preferred miss | Wind/elevation | Next-shot shape | Score
    -----|-------|---------------|-----------------|-----------------|------------------|------
      1  |       |               |                 |                 |                  |      
      2  |       |               |                 |                 |                  |      
      3  |       |               |                 |                 |                  |      
      4  |       |               |                 |                 |                  |      
      5  |       |               |                 |                 |                  |      
      6  |       |               |                 |                 |                  |      
      7  |       |               |                 |                 |                  |      
      8  |       |               |                 |                 |                  |      
      9  |       |               |                 |                 |                  |      
    
    One thing to repeat: ______________________________________
    One thing to change: ______________________________________

    For formal competition, keep score in the way required for your event. The current PDGA rules explain how scores are recorded and reconciled; the course-notes sheet is a planning aid, not a replacement for the official scorekeeping process.

    Make the sheet work for your group

    Different players can use the same layout in different ways. A beginner may only need the landing zone, preferred miss and score. A more experienced player may add a second landing option, a skip note or a wind reminder. A club can use the sheet to collect feedback after a new layout is installed.

    If you are playing with friends, agree that notes are for learning rather than judging. Share a useful observation when someone asks, but let each player make their own decision. The best course notes create confidence without turning a casual round into a lecture.

    The takeaway

    A course-notes sheet is a tiny tool with a useful job: it turns a round into information you can use again. Record the landing zone, the preferred miss, the wind, the next-shot shape and one clear adjustment. Keep the notes short, review them before your next visit, and update them when the course or conditions change.

    Better rounds rarely come from remembering everything. They come from remembering the few decisions that matter.

    Source note: For the formal scoring principles referenced above, see the PDGA Official Rules, section 808 Scoring.

    FAQs

    What is a disc golf course-notes sheet?

    It is a simple planning page for recording useful details about each hole, such as the landing zone, preferred miss, wind, elevation and next-shot shape.

    Do I need course notes to play disc golf?

    No. You can play without them. Notes are useful when you want to learn a new course, make more consistent decisions or remember what worked on a previous visit.

    What should I write down first?

    Start with the hole shape, a sensible first landing zone and the safest useful miss. These details help you plan the opening throw before adding more information.

    Should I record every bad throw?

    No. Record patterns and decisions that can change next time. A short adjustment such as “start wider” is usually more useful than a detailed account of one unlucky bounce.

    Can beginners use the printable sheet?

    Yes. Beginners can keep it simple by using the landing-zone, preferred-miss and score fields, then add wind or next-shot notes as they become more comfortable.

    Does a course-notes sheet replace an official scorecard?

    No. It is a planning and learning aid. In formal competition, follow the event’s scoring process and the applicable official rules.

  • Free printable: a simple disc golf course-notes sheet for better rounds

    A new disc golf course can feel like a puzzle. You are trying to work out the lines, the wind, the landing zones, the out-of-bounds areas and the safest way to reach the basket — all while a group waits behind you and your first throw is already in your hand.

    A simple course-notes sheet gives you somewhere to put those decisions. It also helps you notice patterns instead of relying on a vague memory of whether a hole felt hard. You do not need a detailed survey, a perfect map or a bag full of specialist discs. You need a few useful observations that make your next shot easier to plan.

    Why course notes are worth keeping

    Most players remember the dramatic parts of a round: the tree kick, the long putt, the disc that disappeared in the rough. Those moments are memorable, but they are not always the information that will help next time.

    Good notes capture repeatable details:

    • where the safest landing area is;
    • which side of the fairway gives you the clearest next shot;
    • how the wind behaves at tee height and near the basket;
    • where a missed shot is likely to finish;
    • what distance or shape you actually faced, rather than what you hoped to throw.

    The aim is not to make a casual round feel like homework. The aim is to reduce decision fatigue. When you return to the course, you can spend less time guessing and more time committing to a sensible plan.

    Use the sheet in three passes

    Pass one: before the first throw

    Walk to the tee and look at the whole hole before choosing a disc. Write down the basic shape: open, wooded, uphill, downhill, tight, wide or mixed. Then identify the first decision that matters. It might be a low ceiling, a turning fairway, a slope beside the basket or a road that you need to avoid.

    Do not try to predict every bounce. Pick one conservative landing zone that leaves you a clear second shot. If you are playing a new course, a controlled first throw is often more useful than a high-risk attempt at the perfect line.

    Pass two: after the drive

    Once your disc has stopped, note what the hole actually gave you. Was the landing zone as generous as it looked from the tee? Did the fairway play narrower than expected? Did the wind push the disc earlier, later or more strongly than you planned?

    Record the useful adjustment in plain language. “Start wider” is better than a paragraph about the throw. “Keep the miss left” is better than writing down every tree you saw. Your future self needs a decision, not a transcript.

    Pass three: after the hole

    When the hole is complete, give it one quick rating for risk and one for confidence. A hole can be difficult but predictable, or easy-looking but full of awkward misses. Those are different problems and deserve different plans.

    Finish with one sentence: “Next time I will…” Examples include “throw a slower disc,” “lay up before the slope,” “aim at the gap, not the basket,” or “check the wind again near the green.” That sentence becomes the most valuable part of the note.

    What to record on each hole

    Keep the sheet small enough to use while you play. These are the fields that earn their space.

    Hole shape

    Use a short label such as straight, gentle hyzer, turning, tunnel, open or split fairway. The label is a prompt to remember the intended flight, not a technical classification.

    First landing zone

    Mark the part of the fairway where you want your opening throw to finish. On a long hole, this may be a broad area rather than a single spot. Choosing it before you throw keeps the plan focused on position.

    Preferred miss

    Every hole has a miss that leaves a better recovery than the others. Write left, right, short, long or centre, then add a few words if needed: “short is safer than long” or “right side blocks the upshot.” This is especially helpful when the basket is near a boundary, steep bank or dense rough.

    Wind and elevation

    You do not need a detailed weather record. Note what you felt: headwind, tailwind, crosswind, swirling, uphill or downhill. If the wind changes during the round, update the note rather than treating the first observation as permanent.

    Next-shot shape

    Write down what the second shot needs to do. It might need to finish flat, stay below branches, avoid skipping or land softly. This helps you choose a disc for the shot you need, not simply the disc you threw well on the previous hole.

    How to turn notes into a better plan

    After the round, look for repeated decisions rather than isolated mistakes. If three holes punished early turn, the lesson may be about release angle or disc selection. If several approaches finished long, the lesson may be about height and ground play. If putting felt difficult, check whether your approach shots were routinely leaving awkward distances.

    Choose only one or two changes for your next round. A long list can make you play cautiously without making you play better. A focused adjustment is easier to remember under pressure.

    You can also separate course notes from technique notes. “Use a wider starting line on hole 6” is course information. “Keep the reach-back level” is a throwing cue. Both are useful, but mixing them together can make the page harder to use when you are standing on the tee.

    Free printable course-notes sheet

    You can print this section directly from your browser or save it as a PDF for your next round. If you prefer paper, use one line per hole and keep the sheet on a clipboard or in a clear sleeve.

    DISC GOLF COURSE NOTES
    
    Course: __________________________   Date: _______________
    Round goal: ______________________________________________
    
    Hole | Shape | Landing zone | Preferred miss | Wind/elevation | Next-shot shape | Score
    -----|-------|---------------|-----------------|-----------------|------------------|------
      1  |       |               |                 |                 |                  |      
      2  |       |               |                 |                 |                  |      
      3  |       |               |                 |                 |                  |      
      4  |       |               |                 |                 |                  |      
      5  |       |               |                 |                 |                  |      
      6  |       |               |                 |                 |                  |      
      7  |       |               |                 |                 |                  |      
      8  |       |               |                 |                 |                  |      
      9  |       |               |                 |                 |                  |      
    
    One thing to repeat: ______________________________________
    One thing to change: ______________________________________

    For formal competition, keep score in the way required for your event. The current PDGA rules explain how scores are recorded and reconciled; the course-notes sheet is a planning aid, not a replacement for the official scorekeeping process.

    Make the sheet work for your group

    Different players can use the same layout in different ways. A beginner may only need the landing zone, preferred miss and score. A more experienced player may add a second landing option, a skip note or a wind reminder. A club can use the sheet to collect feedback after a new layout is installed.

    If you are playing with friends, agree that notes are for learning rather than judging. Share a useful observation when someone asks, but let each player make their own decision. The best course notes create confidence without turning a casual round into a lecture.

    The takeaway

    A course-notes sheet is a tiny tool with a useful job: it turns a round into information you can use again. Record the landing zone, the preferred miss, the wind, the next-shot shape and one clear adjustment. Keep the notes short, review them before your next visit, and update them when the course or conditions change.

    Better rounds rarely come from remembering everything. They come from remembering the few decisions that matter.

    Source note: For the formal scoring principles referenced above, see the PDGA Official Rules, section 808 Scoring.

    FAQs

    What is a disc golf course-notes sheet?

    It is a simple planning page for recording useful details about each hole, such as the landing zone, preferred miss, wind, elevation and next-shot shape.

    Do I need course notes to play disc golf?

    No. You can play without them. Notes are useful when you want to learn a new course, make more consistent decisions or remember what worked on a previous visit.

    What should I write down first?

    Start with the hole shape, a sensible first landing zone and the safest useful miss. These details help you plan the opening throw before adding more information.

    Should I record every bad throw?

    No. Record patterns and decisions that can change next time. A short adjustment such as “start wider” is usually more useful than a detailed account of one unlucky bounce.

    Can beginners use the printable sheet?

    Yes. Beginners can keep it simple by using the landing-zone, preferred-miss and score fields, then add wind or next-shot notes as they become more comfortable.

    Does a course-notes sheet replace an official scorecard?

    No. It is a planning and learning aid. In formal competition, follow the event’s scoring process and the applicable official rules.

  • Free printable: a simple disc golf course-notes sheet for better rounds

    Free printable: a simple disc golf course-notes sheet for better rounds

    A new disc golf course can feel like a puzzle. You are trying to work out the lines, the wind, the landing zones, the out-of-bounds areas and the safest way to reach the basket — all while a group waits behind you and your first throw is already in your hand.

    A simple course-notes sheet gives you somewhere to put those decisions. It also helps you notice patterns instead of relying on a vague memory of whether a hole felt hard. You do not need a detailed survey, a perfect map or a bag full of specialist discs. You need a few useful observations that make your next shot easier to plan.

    Why course notes are worth keeping

    Most players remember the dramatic parts of a round: the tree kick, the long putt, the disc that disappeared in the rough. Those moments are memorable, but they are not always the information that will help next time.

    Good notes capture repeatable details:

    • where the safest landing area is;
    • which side of the fairway gives you the clearest next shot;
    • how the wind behaves at tee height and near the basket;
    • where a missed shot is likely to finish;
    • what distance or shape you actually faced, rather than what you hoped to throw.

    The aim is not to make a casual round feel like homework. The aim is to reduce decision fatigue. When you return to the course, you can spend less time guessing and more time committing to a sensible plan.

    Use the sheet in three passes

    Pass one: before the first throw

    Walk to the tee and look at the whole hole before choosing a disc. Write down the basic shape: open, wooded, uphill, downhill, tight, wide or mixed. Then identify the first decision that matters. It might be a low ceiling, a turning fairway, a slope beside the basket or a road that you need to avoid.

    Do not try to predict every bounce. Pick one conservative landing zone that leaves you a clear second shot. If you are playing a new course, a controlled first throw is often more useful than a high-risk attempt at the perfect line.

    Pass two: after the drive

    Once your disc has stopped, note what the hole actually gave you. Was the landing zone as generous as it looked from the tee? Did the fairway play narrower than expected? Did the wind push the disc earlier, later or more strongly than you planned?

    Record the useful adjustment in plain language. “Start wider” is better than a paragraph about the throw. “Keep the miss left” is better than writing down every tree you saw. Your future self needs a decision, not a transcript.

    Pass three: after the hole

    When the hole is complete, give it one quick rating for risk and one for confidence. A hole can be difficult but predictable, or easy-looking but full of awkward misses. Those are different problems and deserve different plans.

    Finish with one sentence: “Next time I will…” Examples include “throw a slower disc,” “lay up before the slope,” “aim at the gap, not the basket,” or “check the wind again near the green.” That sentence becomes the most valuable part of the note.

    What to record on each hole

    Keep the sheet small enough to use while you play. These are the fields that earn their space.

    Hole shape

    Use a short label such as straight, gentle hyzer, turning, tunnel, open or split fairway. The label is a prompt to remember the intended flight, not a technical classification.

    First landing zone

    Mark the part of the fairway where you want your opening throw to finish. On a long hole, this may be a broad area rather than a single spot. Choosing it before you throw keeps the plan focused on position.

    Preferred miss

    Every hole has a miss that leaves a better recovery than the others. Write left, right, short, long or centre, then add a few words if needed: “short is safer than long” or “right side blocks the upshot.” This is especially helpful when the basket is near a boundary, steep bank or dense rough.

    Wind and elevation

    You do not need a detailed weather record. Note what you felt: headwind, tailwind, crosswind, swirling, uphill or downhill. If the wind changes during the round, update the note rather than treating the first observation as permanent.

    Next-shot shape

    Write down what the second shot needs to do. It might need to finish flat, stay below branches, avoid skipping or land softly. This helps you choose a disc for the shot you need, not simply the disc you threw well on the previous hole.

    How to turn notes into a better plan

    After the round, look for repeated decisions rather than isolated mistakes. If three holes punished early turn, the lesson may be about release angle or disc selection. If several approaches finished long, the lesson may be about height and ground play. If putting felt difficult, check whether your approach shots were routinely leaving awkward distances.

    Choose only one or two changes for your next round. A long list can make you play cautiously without making you play better. A focused adjustment is easier to remember under pressure.

    You can also separate course notes from technique notes. “Use a wider starting line on hole 6” is course information. “Keep the reach-back level” is a throwing cue. Both are useful, but mixing them together can make the page harder to use when you are standing on the tee.

    Free printable course-notes sheet

    You can print this section directly from your browser or save it as a PDF for your next round. If you prefer paper, use one line per hole and keep the sheet on a clipboard or in a clear sleeve.

    DISC GOLF COURSE NOTES
    
    Course: __________________________   Date: _______________
    Round goal: ______________________________________________
    
    Hole | Shape | Landing zone | Preferred miss | Wind/elevation | Next-shot shape | Score
    -----|-------|---------------|-----------------|-----------------|------------------|------
      1  |       |               |                 |                 |                  |      
      2  |       |               |                 |                 |                  |      
      3  |       |               |                 |                 |                  |      
      4  |       |               |                 |                 |                  |      
      5  |       |               |                 |                 |                  |      
      6  |       |               |                 |                 |                  |      
      7  |       |               |                 |                 |                  |      
      8  |       |               |                 |                 |                  |      
      9  |       |               |                 |                 |                  |      
    
    One thing to repeat: ______________________________________
    One thing to change: ______________________________________

    For formal competition, keep score in the way required for your event. The current PDGA rules explain how scores are recorded and reconciled; the course-notes sheet is a planning aid, not a replacement for the official scorekeeping process.

    Make the sheet work for your group

    Different players can use the same layout in different ways. A beginner may only need the landing zone, preferred miss and score. A more experienced player may add a second landing option, a skip note or a wind reminder. A club can use the sheet to collect feedback after a new layout is installed.

    If you are playing with friends, agree that notes are for learning rather than judging. Share a useful observation when someone asks, but let each player make their own decision. The best course notes create confidence without turning a casual round into a lecture.

    The takeaway

    A course-notes sheet is a tiny tool with a useful job: it turns a round into information you can use again. Record the landing zone, the preferred miss, the wind, the next-shot shape and one clear adjustment. Keep the notes short, review them before your next visit, and update them when the course or conditions change.

    Better rounds rarely come from remembering everything. They come from remembering the few decisions that matter.

    Source note: For the formal scoring principles referenced above, see the PDGA Official Rules, section 808 Scoring.

    FAQs

    What is a disc golf course-notes sheet?

    It is a simple planning page for recording useful details about each hole, such as the landing zone, preferred miss, wind, elevation and next-shot shape.

    Do I need course notes to play disc golf?

    No. You can play without them. Notes are useful when you want to learn a new course, make more consistent decisions or remember what worked on a previous visit.

    What should I write down first?

    Start with the hole shape, a sensible first landing zone and the safest useful miss. These details help you plan the opening throw before adding more information.

    Should I record every bad throw?

    No. Record patterns and decisions that can change next time. A short adjustment such as “start wider” is usually more useful than a detailed account of one unlucky bounce.

    Can beginners use the printable sheet?

    Yes. Beginners can keep it simple by using the landing-zone, preferred-miss and score fields, then add wind or next-shot notes as they become more comfortable.

    Does a course-notes sheet replace an official scorecard?

    No. It is a planning and learning aid. In formal competition, follow the event’s scoring process and the applicable official rules.

  • Build a backyard practice setup that will not wreck the lawn

    Build a backyard practice setup that will not wreck the lawn

    A backyard can make short disc golf practice easier to fit into the week, but the setup should work for the lawn, the neighbours and the people sharing the space. The best home practice area is simple: a safe target, a clear throwing direction and drills that reward control instead of maximum power.

    Choose the target before the throw

    Start with a target that is suitable for the space. A portable basket can be useful when there is room to throw safely, while a marked landing zone or a low-risk target can work for shorter drills. Keep the target away from windows, vehicles, fences, play areas and any place where an errant disc could cause trouble.

    Use a clear throwing direction and make sure everyone in the area knows when a throw is happening. If the space cannot provide a safe stopping area, move the drill closer or choose a putting-only exercise.

    Protect the lawn

    Repeated run-ups and hard planting can wear one patch of ground quickly. Rotate your starting point, use a mat where appropriate and avoid practising when the ground is saturated. A smaller number of controlled throws is kinder to the surface than a long session of full-power drives.

    Watch for worn grass, exposed roots and slippery footing. Repair or move the setup when the surface begins to deteriorate. The goal is to keep the practice area usable, not to prove that every drill can happen in one exact spot.

    Build three small stations

    1. Putting station: choose a short distance and practise a repeatable stance, release and finish.
    2. Landing-zone station: mark an area and try to land approaches inside it with different speeds.
    3. Line-choice station: set two safe gates or visual lines and decide which route gives you the most control before throwing.

    Give each station a time limit. A short rotation keeps the session focused and reduces the temptation to keep throwing after the surface or your technique starts to fade.

    Keep the home session neighbour-friendly

    Choose reasonable practice times, keep discs and bags tidy, and stop if someone enters the throwing area. If a neighbour has a concern, listen and adjust the setup. A home practice area is only useful when it can coexist with the people around it.

    Where a rental agreement, body corporate rule or local guidance applies, check it before installing anything permanent. A temporary setup is often the most flexible option and makes it easier to pack away when the space is needed for another purpose.

    Measure control, not distance

    For a home session, count how often the disc finishes in the intended zone, how often your putting routine stays consistent or how many clean releases you make. Write down one useful cue and stop while the drill is still tidy. That approach builds a repeatable habit without turning the backyard into a full driving range.

    Use a reset cue

    Choose one short cue before each set, such as “smooth release” or “balanced finish”. If the throw becomes rushed, pause, collect the discs and start the next set from the same safe station. A reset cue keeps the session focused without adding more technical changes.

    FAQs

    Do I need a permanent basket at home?

    No. A portable target, marked landing zone or putting-only station can provide useful practice when it suits the available space.

    How can I protect the lawn?

    Rotate starting points, use a mat where suitable, avoid saturated ground and move the setup when repeated throws begin to wear the surface.

    Where should I place a backyard target?

    Choose a clear area away from windows, vehicles, fences, play spaces and other places where a stray disc could cause damage or injury.

    What should I practise in a small backyard?

    Putting, approach landing zones and controlled line-choice drills can work in a smaller area without requiring full-power drives.

    When should I stop a practice session?

    Stop when the planned time ends, when the ground becomes unsafe or when the throwing area is no longer clear.

    Should a home setup be permanent?

    Not necessarily. A temporary setup is often easier to move, store and adapt to rental, body corporate or shared-space requirements.

  • Plan a disc golf weekend roadie around Aotearoa

    Plan a disc golf weekend roadie around Aotearoa

    New Zealand is built for a disc golf roadie: short drives, big scenery and courses tucked into parks, reserves and bush edges. The best trips are usually smaller than the ambitious plan in your head. Pick a couple of good stops, leave room for weather and conversation, and make the drive part of the experience.

    Pick two courses, not five

    One course in the morning and one on the way home beats a frantic checklist. You will have time to learn the first course, stop for food and remember the round. Check local club pages and course listings for maps, parking notes, shared-use information and any events on the weekend you are considering.

    Choose a second course that gives you a different feel rather than another version of the same round. A shorter layout can be a better finish after a long drive.

    Build in a weather decision

    Check the forecast shortly before leaving, but keep a simple backup plan. Wind, rain and wet ground can change how enjoyable a course is, and a public park may have areas that are slippery or busy after bad weather.

    Carry a lightweight rain layer and decide in advance what would make you shorten the round, swap courses or stop for the day. That is good planning, not giving up.

    Use a simple day shape

    Plan the day around a few anchors: departure time, first tee time, a food break and a latest finish. Leave open space between them for parking, finding the first tee, slower groups and changing conditions. A flexible plan is easier to share with new players.

    Pack for a long day

    Water, snacks, a towel, spare socks, sunscreen and a few spare discs cover most ordinary roadie needs. Add a mini marker, phone charger and a small first-aid kit for the car. Keep one dry layer separate so it is still dry when you need it.

    Make it social and considerate

    Post in a local club group before you go and ask whether there is a course note, temporary layout or busy period to know about. A guide who knows the lines can turn a new course into a highlight, but do not assume someone else will organise the whole day.

    Bring a spare beginner-friendly disc and invite someone along. Follow local signs, share the park politely, pack out rubbish, avoid sensitive areas and report hazards or damaged baskets to the relevant club or course contact.

    FAQs

    How many courses should a weekend roadie include?

    Two is a useful starting point: one main round and one second stop that leaves enough time for food, travel and changing weather.

    What should I check before leaving?

    Check course access, parking, shared-use notes, local events and the forecast. Recheck the important details before the drive home.

    What if the weather turns?

    Use the backup decision you made before leaving. Shorten the round, change course or stop if conditions make play unsafe or unpleasant.

    What are the most useful items to pack?

    Water, food, a towel, spare socks, sunscreen, a rain layer, a mini marker, a phone charger and a small first-aid kit are practical basics.

    Should I invite a local guide?

    If a club member is available, their course knowledge can help. Ask respectfully and make your own plan rather than assuming they are responsible for the trip.

    How can I be a considerate visitor?

    Follow local signs, share the park politely, pack out rubbish, avoid sensitive areas and report hazards or damage to the relevant club or course contact.

  • How to run a casual doubles night that people come back to

    How to run a casual doubles night that people come back to

    The best club nights are easy to join, quick to explain and enjoyable even for the players who finish last. Casual doubles works well because experienced players can support newer ones without making the evening feel like a lesson. The trick is to give the night enough structure to feel organised, while leaving plenty of room for conversation and fun.

    Keep the format simple

    Random-draw doubles is a dependable starting point. Pair an experienced player with someone newer where possible, play best shot, and explain only the rules people need for the round. Nine or eighteen holes can work; choose the length that leaves time for a relaxed finish.

    Tell players how teams are formed, where to meet and how the winning score will be decided. If you add a handicap, novelty rule or side game, write it down before the first tee so nobody is surprised.

    Make the first round welcoming

    Give new players a five-minute briefing: where to stand, how to mark a lie, how to take turns and what to do if a disc goes out of bounds or is lost. Keep the explanation practical and invite questions.

    Pair new players with friendly people who will explain without taking over. A small welcome at the start often matters more than the prize at the end.

    Use a small side game

    One closest-to-the-pin hole, a longest-putt challenge or a playful award for the best team spirit can lift the energy without adding much administration. Keep it optional and low pressure. The main event should remain easy to follow.

    Finish with a clear result

    Collect cards, check that every hole has a score and announce the result before people leave if you can. Thank the course volunteers and anyone who helped with groups, cards or the briefing. A quick photo or short results post makes the next night easier to promote, provided everyone is comfortable with it.

    Use feedback to build a habit

    Ask one simple question afterwards: what should stay the same, and what should change next time? Record the answer while it is fresh. Rotate the organiser role if possible, and keep the same meeting point and day of the week when that suits the club.

    FAQs

    How many players do I need?

    There is no fixed number. Start with the players you have, form groups that keep play moving and use a shorter round if attendance is small.

    Should teams be random?

    Random teams are simple and fair for a social night. You can also balance experience deliberately when the goal is to help newer players feel comfortable.

    Is best-shot doubles hard to explain?

    No. Explain that both partners throw, the team chooses the better lie, and both throw again from that lie until the hole is complete.

    Do I need prizes?

    No. A result, a thank-you and a fun side award are enough. If you offer a prize, keep it optional and explain it before play.

    How do I include complete beginners?

    Give them a friendly partner, a short rules briefing and permission to ask questions. A nine-hole format can also make the first night less tiring.

    What should I do after the event?

    Check the cards, share the result if appropriate, thank helpers and record one improvement for next time. Consistent follow-up helps a casual night become a regular club fixture.